Shower with a SPLASH
I was tasked with creating an OXO hand-held shower and wall-mounted control module. The deliverable was a low-fidelity prototype that effectively communicated my idea for the design. Through sketching, prototyping, and user testing, I met design requirements and created an effective design.
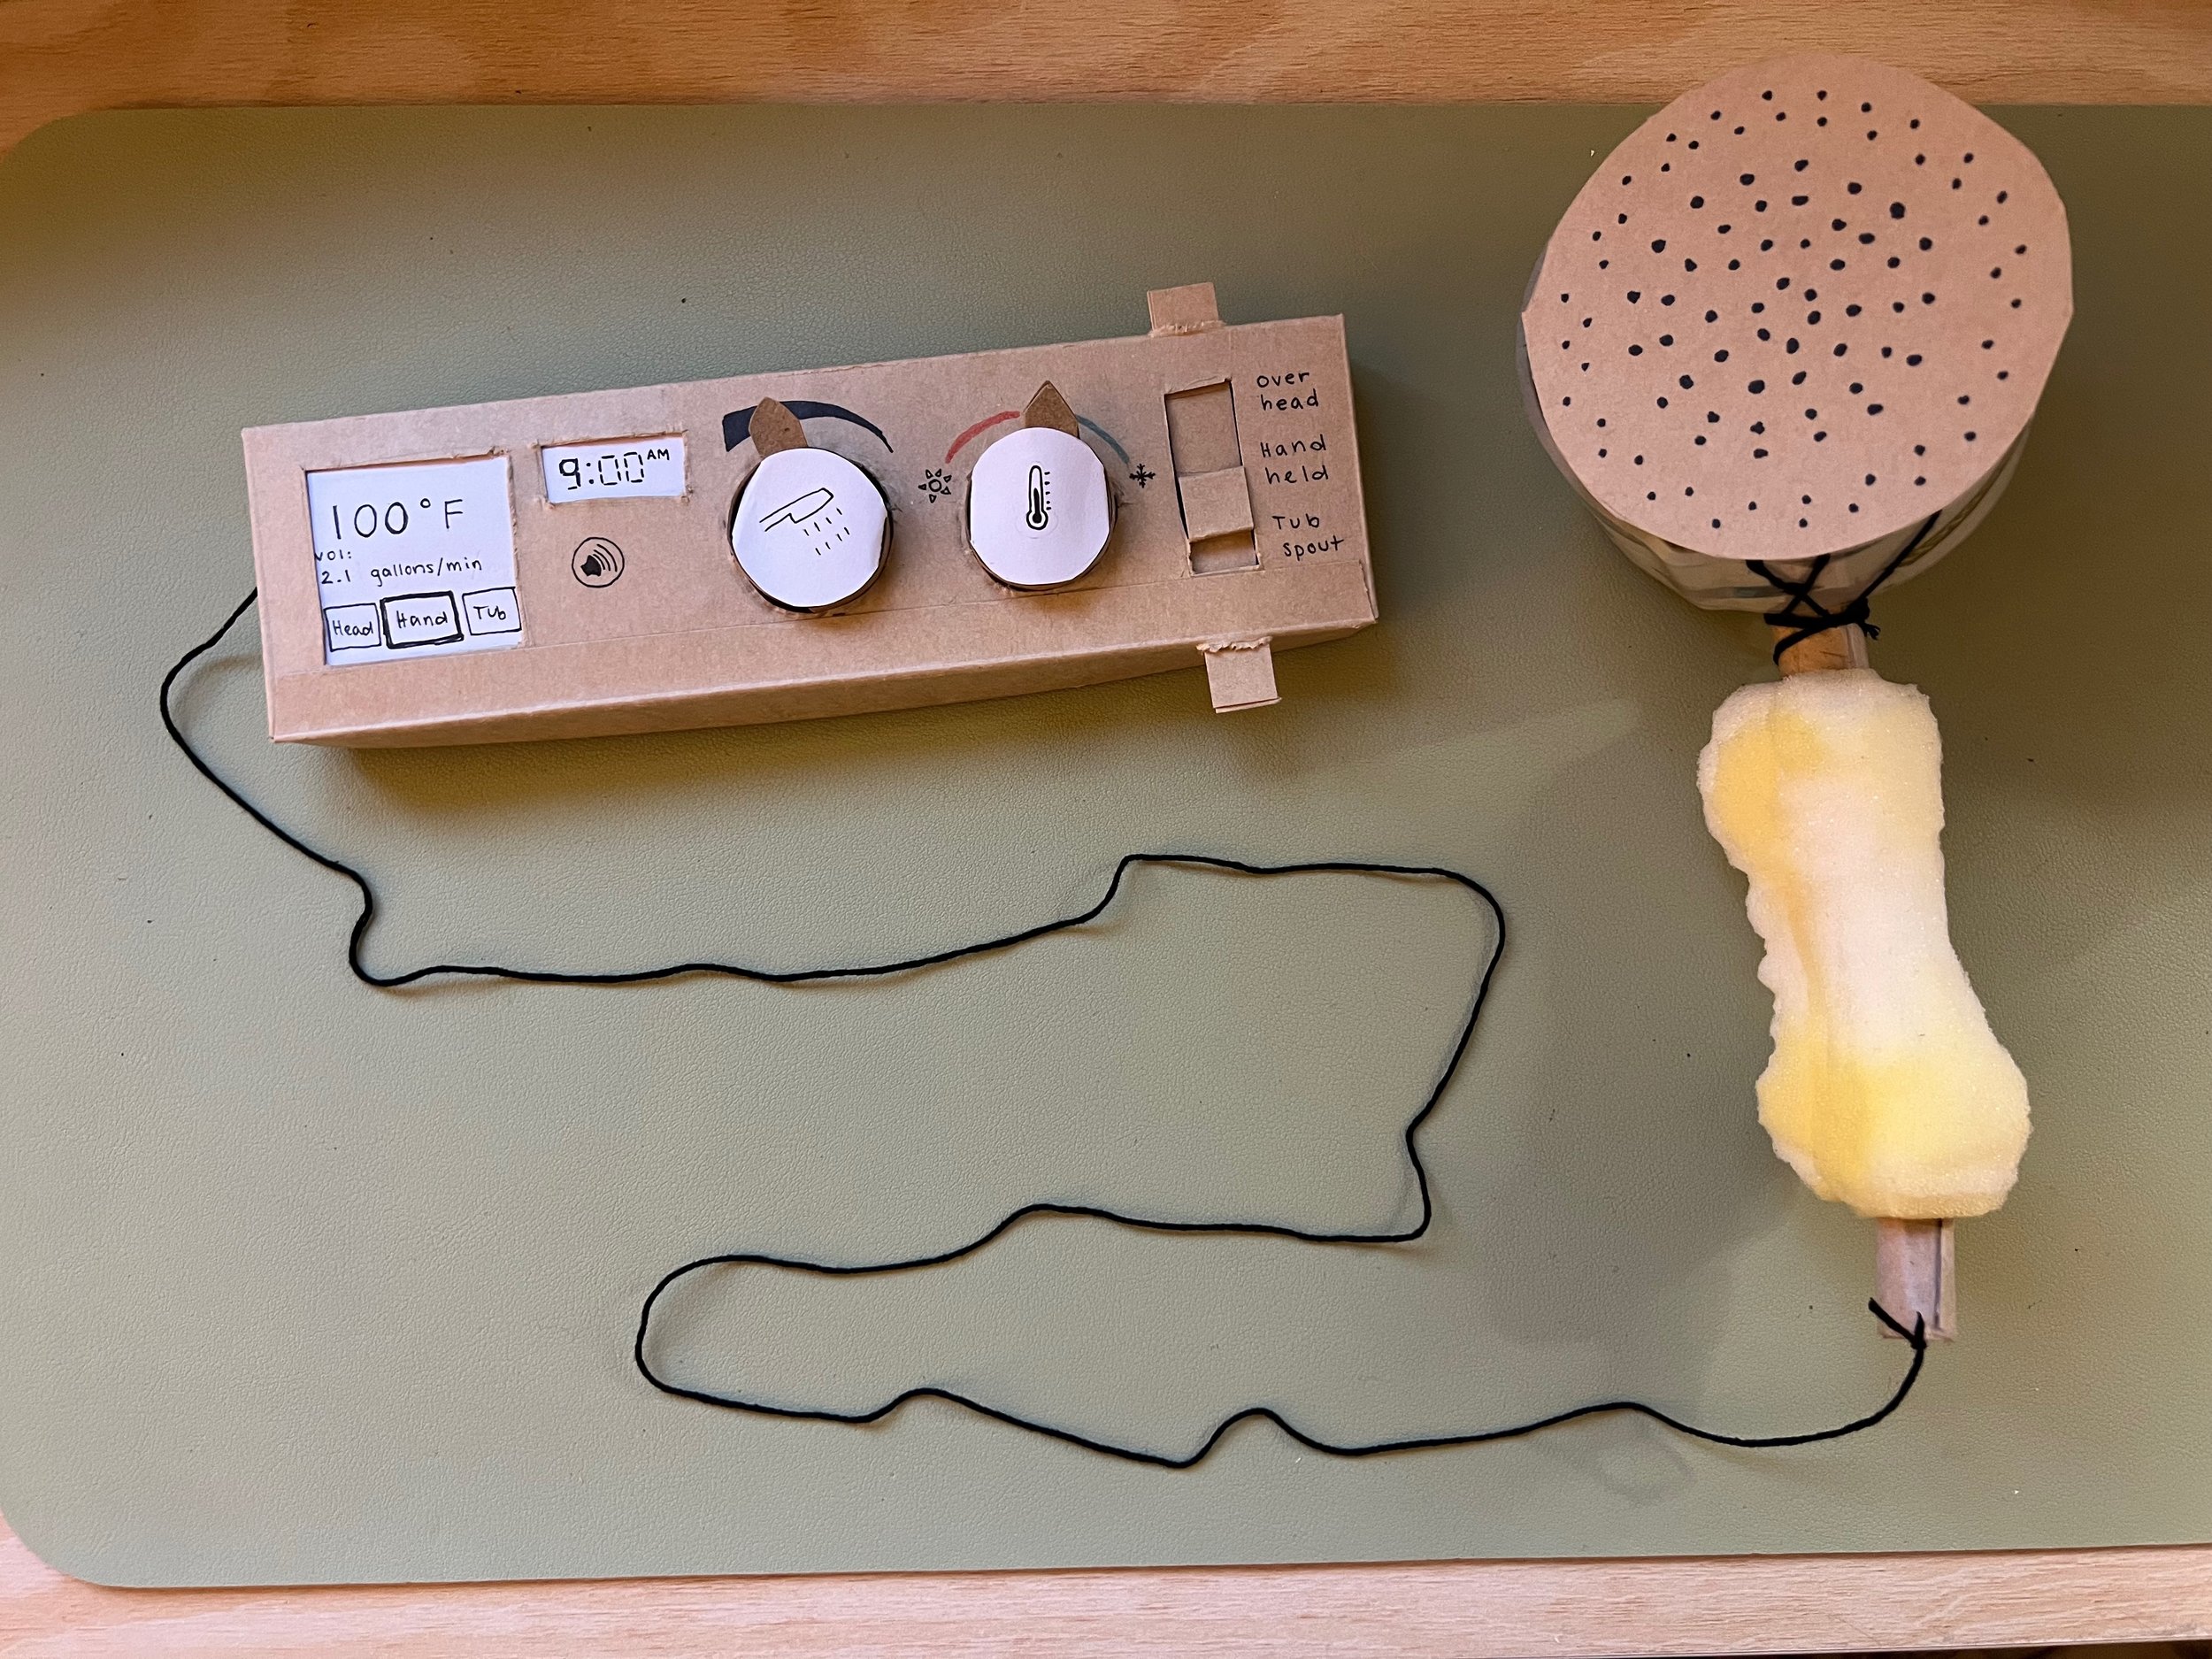
Final low-fidelity prototype of the shower control module and handheld wand
Design
I started by reviewing the design requirements carefully. Throughout the process, I aimed for a well-designed, comfortable, and easy-to-use deliverable, as these were the goals of the OXO company. The first requirement was that the prototype consists of a handheld wand and a wall mounted module. The display and controls could be on either the wall module or the hand-held wand. My prototype met this requirement because my wall-mounted module contains all of the controls and display, while the connected hand-held wand does not. I chose this because the user can adjust any controls at the onset of the shower using the module, and then return to the module as necessary throughout the shower. If the controls were on the wand, they risk getting wet or soapy. Also, the wall module allowed for more space to include tactile controls, which are beneficial to users who are low-vision or without corrective lenses.
The second requirement was that the wand weight must be approximately 0.75 pounds and connect to the wall module. My prototype wand connects to the wall module by a “cord” (demonstrated by embroidery thread), and has not been weighed yet.
The third requirement was that the digital display shows water temperature, water flow volume, and valves. My prototype met this by displaying temperature, water flow volume, and location of water spray. The display adjusts automatically based on the user's interaction with the controls to the right. I chose rotating controls for water volume and temperature because I think that turning a control feels intuitive when adjusting water temperature. I chose a vertical sliding switch to adjust the location of water spray because the location of the switch mimics the location of the overhead shower, handheld shower, and tub spout (high, middle, low).
My wall module also includes a clock to display the current time. This is to encourage users to be aware of the time when they are showering, and encourage shorter showers. This aligns with my goal of creating designs that are sustainable, and aim to reduce harm to the environment.
The fourth design requirement stated that physical affordances and controls must be easy to use when visibility and dexterity are challenged by soapy hands, steamy showers, and absence of corrective lenses. I met this challenge in three ways: tactile controls on the wall module, a screen-reader button that voices current display settings, and a comfortable, yet soft and sturdy wand handle.
Sketches
My prototyping process started with sketches of controls and layout of the wall module. I sketched rotating controls, button controls, switch controls, and different digital display layouts. Then I sketched many different handle designs for the handheld wand. I focused on comfort and grip.

Prototype
I began physical prototyping with the wall module. I used a cardboard box to cut out the shape, then sketched and cut out the locations for the controls on the module. Then I made the switch button and the circular rotating controls for temperature and water flow. After sketching the digital screens on paper, I taped them to the wall module.

Prototyping the wall-mounted module
Next I cut the handle for the handheld shower wand out of foam. My goal was to make the handle a seamless fit for a hand, using curves and rounded edges that could encourage a user to grip it easily. This was difficult because the foam I used was very soft. I used scissors and a foam cutting knife for this process. It was challenging to attach the comfortable foam handle to the rest of the shower wand. I cut the foam handle in half and sewed a pencil between the two halves. Then I attached cardboard to either end of the pencil to demonstrate the width of the wand.

Cutting out the foam handle
I used a roll of packing tape to indicate the shower head and sewed it into the rest of the wand. I used cardboard to make the surface where water comes out. I chose the location of the holes based on my research into existing shower heads.

Attaching the handle to the shower head
Lastly I attached the wand to the wall module using thread that demonstrates where the water tube would go.

Final low-fidelity prototype
This design could be refined and iterated with more time and resources.
Analysis
I tested my prototype with three design students. This consisted of two ten minute testing sessions, for a total of 20 minutes of testing. Based on this, I gathered the following insights:
Things that worked well:
Users felt that the controls on the wall module were very intuitive.
Users noted that the raised buttons would help with physical affordance and grip with slippery hands.
Users noticed that the simple icons on the rotating controls are universally understood.
Users enjoyed the weight of the hand-held wand, and the grip of the wand handle.
Things that needed improvement:
The biggest issue was that users were confused about the audio button next to the display screen. They thought that it was for music.
“the only thing that's confusing is the sound button” (User 1)
“I don't understand what this button does: is it music? Is it blind so you can hear?” (User 2)
Users felt that it would be hard to change the temperature my one or two degrees using the rotating dial. One user suggested that the dial could click from one temperature to another instead of a smooth turning dial.
One user mentioned that the text might be too small to see without corrective lenses.
One user mentioned that there is no way to change between fahrenheit and celsius.
In conclusion, my design was intuitive and usable as a handheld shower. This iteration of the prototype has clear controls and good physical affordance, however it could be improved in future iterations. If I had more time for this project, I would label the audio button and make it tactile and do more research into existing screen-reader buttons. I would also look into different ways to control the temperature, specifically, how I could adjust the rotating dial to make small adjustments to the temperature. I would also iterate the entire control module to see it at a larger size and see if that would increase physical affordance and readability.